Blog
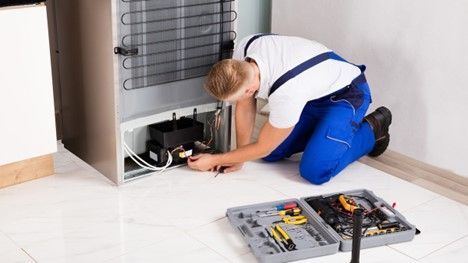
Recognizing the Signs of Refrigerator Trouble A fridge usually delivers discreet warnings before failing. On one morning, milk feels warmer than usual, ice cubes form unevenly, or a quiet hum sounds off. By afternoon, the freezer may have a small puddle or moist areas on the back wall. Most individuals miss these signs until groceries deteriorate and panic ensues. Technicians often see the root cause: a thermostat out of range, a compressor that won't start, or a door gasket that won't seal. Recognition of these early indicators and contacting a professional refrigerator repair service near me can prevent a minor inconvenience from becoming a costly tragedy. The First Step: Phone Consultation The initial call is more than just booking a visit. A qualified specialist will closely examine the cause of unnatural sounds, water leakage, temperature changes, etc. Varying to whether adjustment, replacement of parts, or complete examination is to be performed, every bit of information will affect the repair method. In times of freezer leakage or food loss, same-day services of such companies as A Plus Appliance Repair Service may come to the rescue. Early intervention prevents the emergence of the problem and guarantees an easy repair upon the arrival of the specialist. Inspection and Diagnosis Upon the arrival of the technician, they embark on a systematic check. Temperatures are monitored, compressors are monitored, seals are inspected, and dust or blockage of the condenser coils is checked. Certain issues are so obvious that a broken thermostat is one example, but there are other, less obvious ones, like a partially clogged line of water or a lost tension gasket. It is comforting to watch this process in action since it demonstrates its accuracy. All the checks and adjustments are necessary, and a person who has experience can isolate the problem in the shortest time possible and not waste a lot of time guessing how to do the job properly, so the work, which is to be repaired, is done correctly in the first place. Knowledge of the Repair Process. After the problem has been outlined, the process of repair is elaborated. Some of the common jobs are the replacement of the worn gaskets, cleaning or adjusting the condenser coils, repairing or replacing compressors or thermostats, and checking the ice makers or water lines to determine if they are blocked. The minor details usually do count the most, and this is something that few people can observe until a professional finds it out. Searching for a reputable refrigerator repair service near me correctly makes such repairs the first time, and listening to the technician like ours can save time and money, as well as repeated visits. Primary Prophylaxis for Long Life span. Stabilizing the immediate problem is not the end of the story. Minor, periodic repairs will help to avoid future emergencies and will prolong the lifespan of a refrigerator. Maintaining the unit level, cleaning out coils, and leaving room to allow air to move and not overloading shelves all ease component strain and enhance performance. These measures are not significant, but as time passes, they create a noticeable change. Looking for reliable local appliance repair near me will give you advice specific to the appliance and kitchen that is much more helpful than any generic advice on appliance maintenance. Conclusion: Ask Before It Is Too Late. When you are ready for what to expect, you will be in a position to cope with the inconvenience that a refrigerator that malfunctions might create in your daily routine. The work of the qualified technicians lies in diagnosing the issues correctly, doing specific repairs correctly, and advising to prevent the recurrence of failures. In case a refrigerator begins malfunctioning, calling us at A Plus Appliance Repair Service immediately helps to save food, avoid water damage, and maintain order in the kitchen. Rapid and efficient service is what stands between a stressful emergency and the issue that was solved in a timely and efficient manner. FAQs 1. How can I tell if my refrigerator needs emergency repair? Look for warmer food, uneven ice, unusual humming, leaks, or damp spots, which usually signal a problem that needs immediate attention. 2. What should I expect during a refrigerator repair visit? The technician will inspect temperatures, seals, coils, and water lines to identify the root cause before performing precise repairs. 3. How long does an emergency refrigerator repair usually take? Most issues can be fixed in one visit, but more complex repairs like compressors or thermostats may take additional time. 4. Can small maintenance steps prevent future refrigerator problems? Keeping the fridge level, cleaning coils, maintaining airflow, and not overloading shelves reduces strain and extends its lifespan. 5. Why should I choose a local appliance repair service like A Plus Appliance Repair Service? Local professionals provide fast, same-day service, expert advice, and ensure repairs are done correctly the first time.
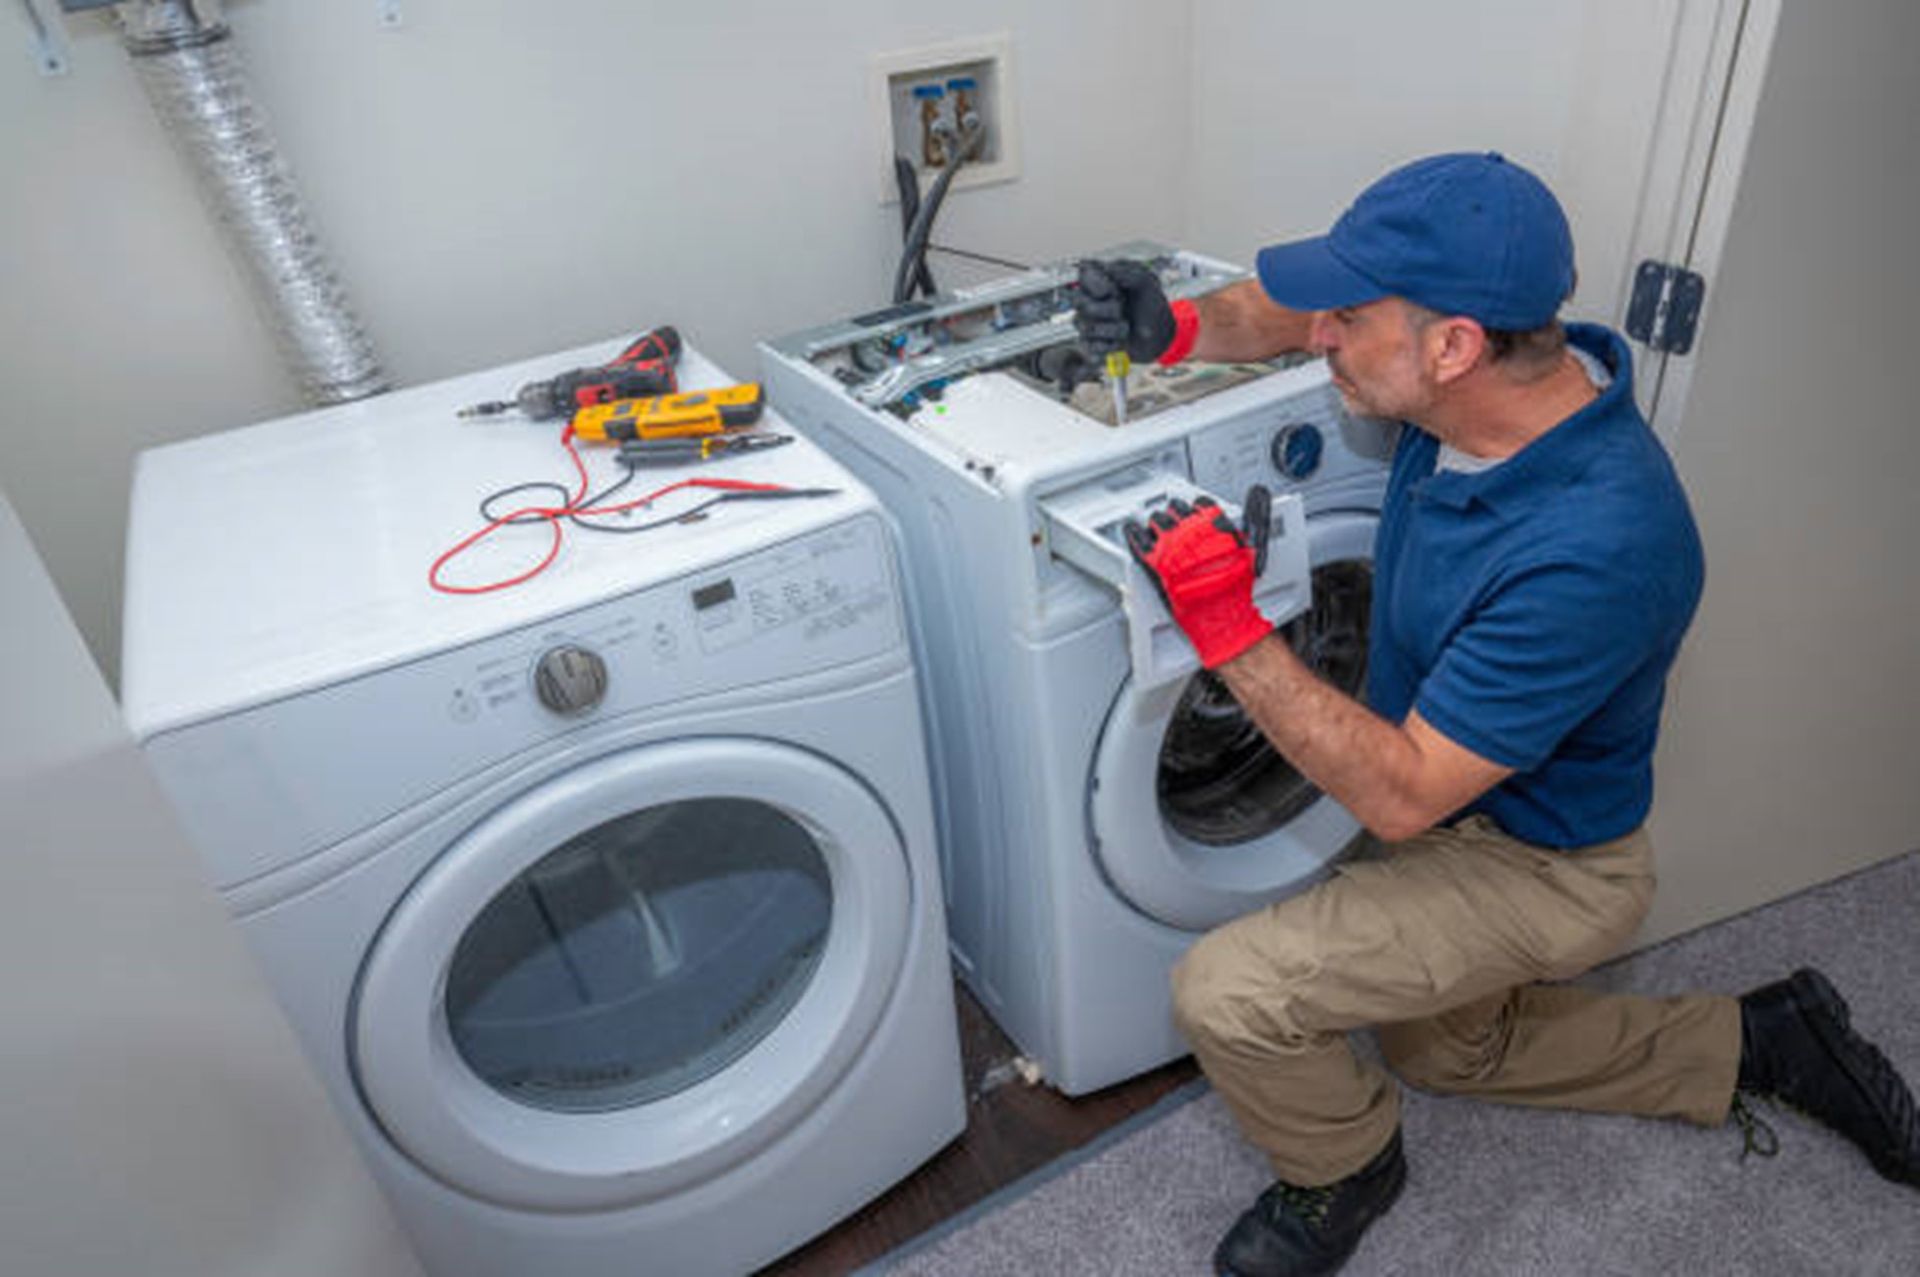
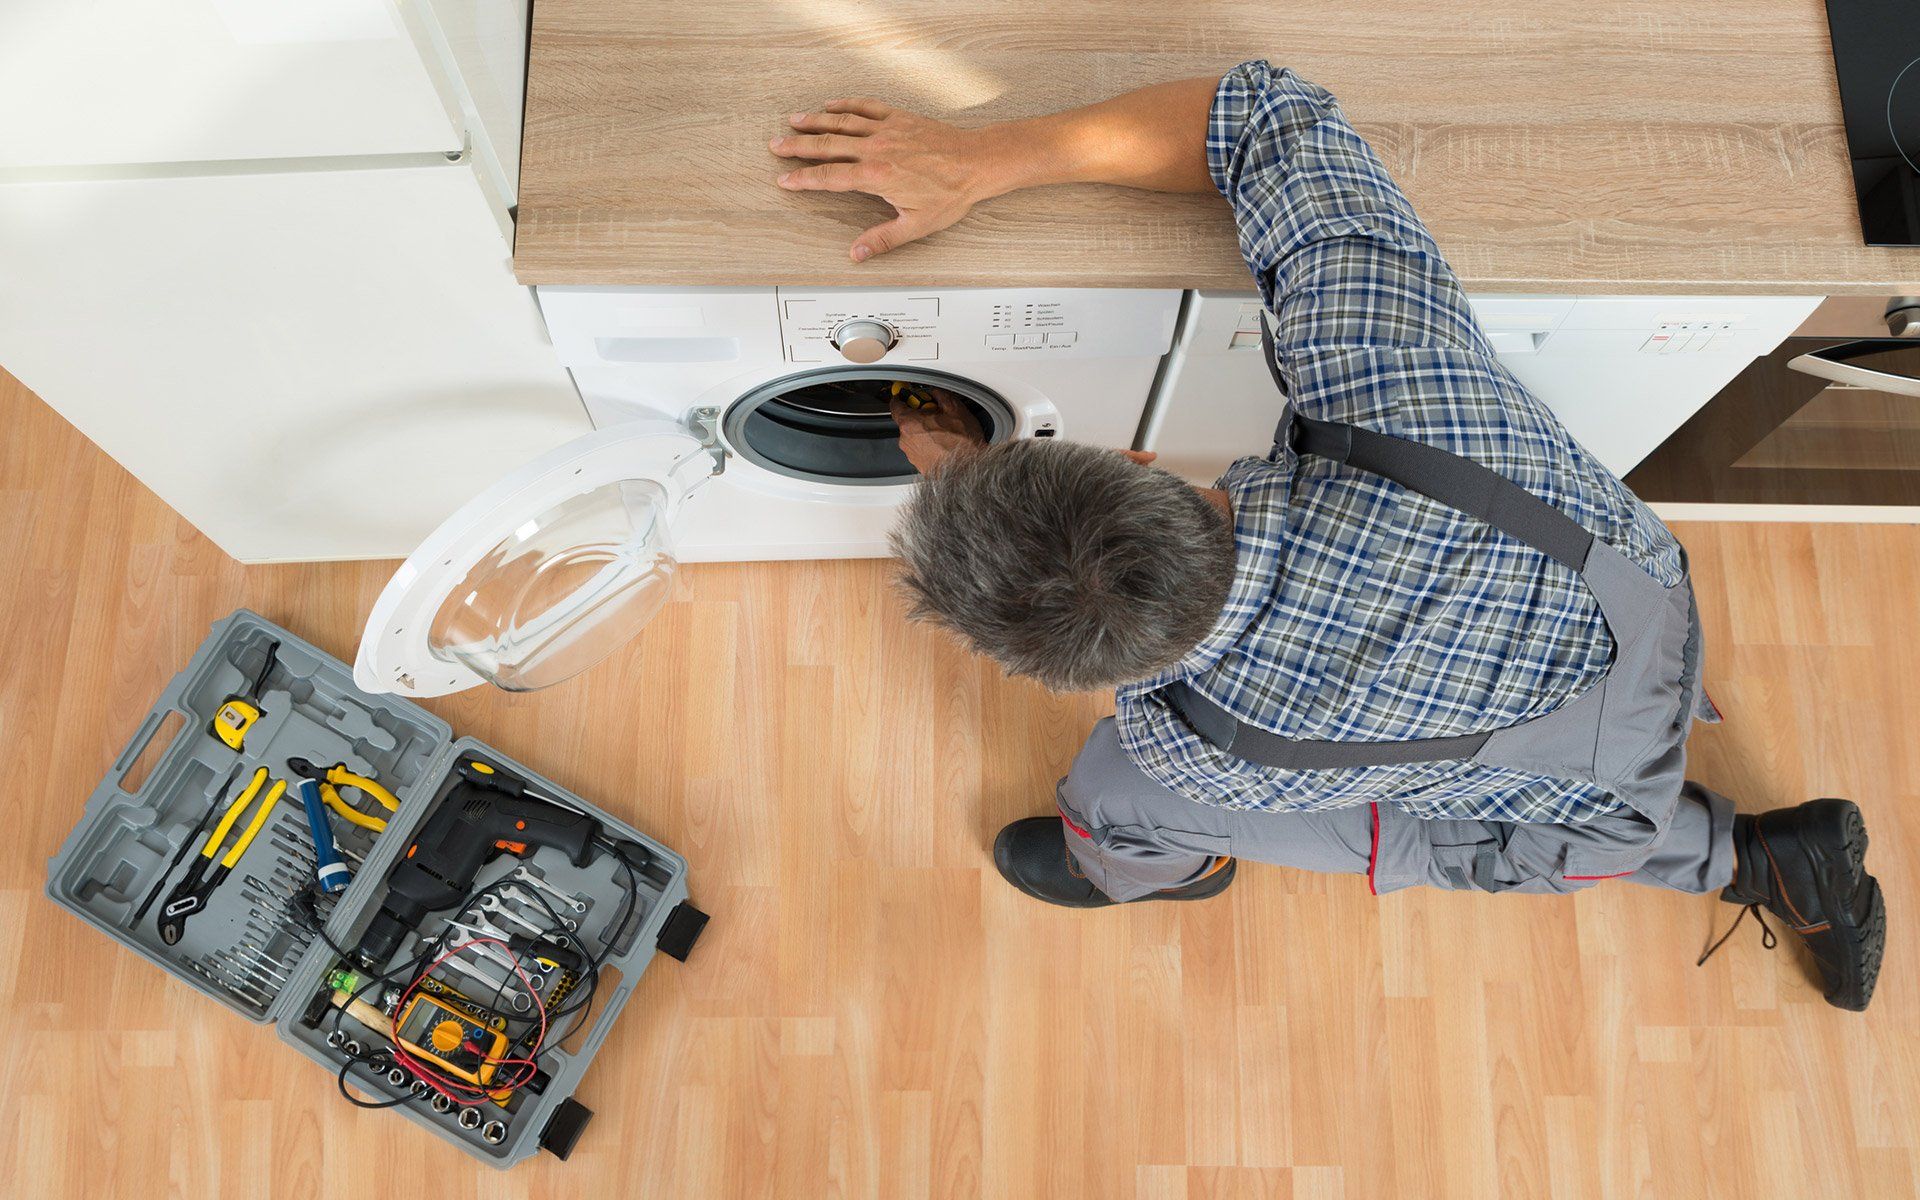
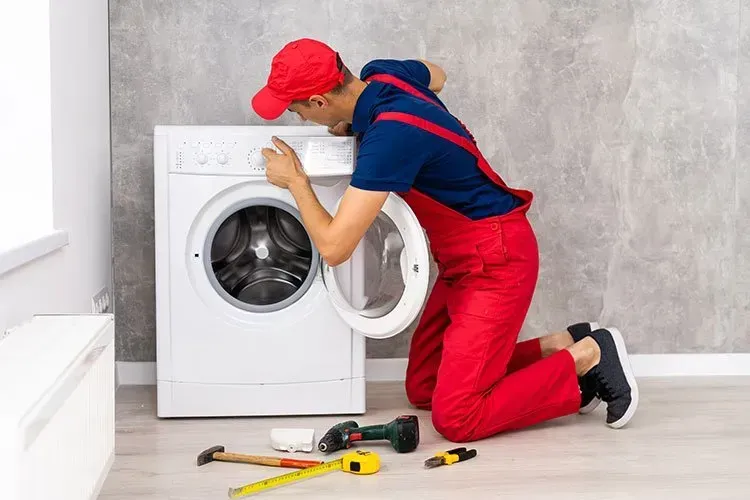
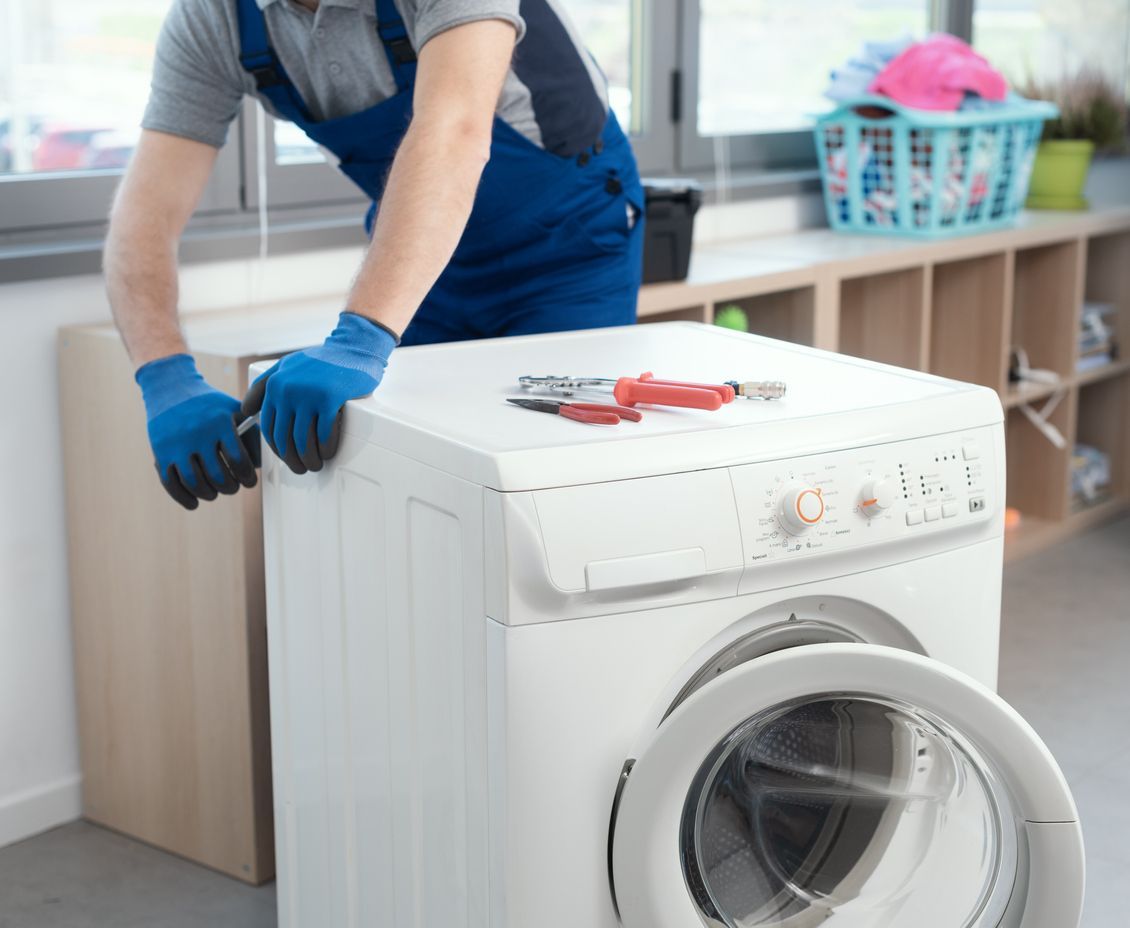
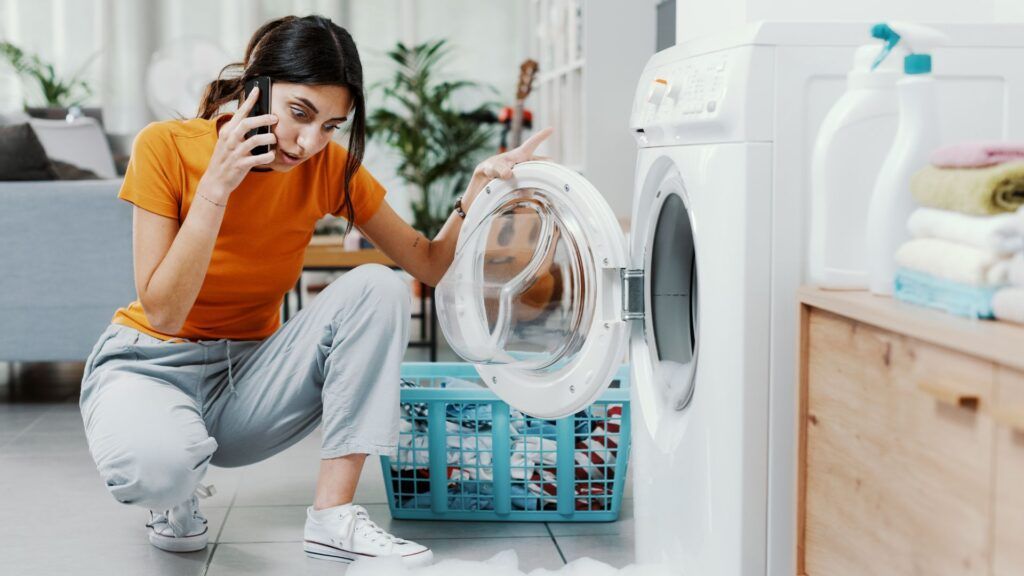
Laundry has a funny way of staying invisible when everything works. You throw in a load, walk away, and a while later the clothes are clean and dry. No drama. Just another task checked off. But the moment something goes wrong, the whole rhythm of the house shifts. A washer that won’t spin properly. A dryer that runs forever but still leaves shirts damp. Suddenly, there are baskets on the floor, towels waiting to be washed, and that quiet laundry room becomes the most annoying room in the house. Most people try to push through it for a while. One more load. Maybe it’ll fix itself. It usually doesn’t. In many cases, the real solution is simpler than expected. A timely washer-dryer repair can bring the machine back to normal before the situation turns into a bigger problem. Small Warning Signs Most People Miss Appliances rarely fail overnight. They tend to complain first. Not loudly, but enough to notice if you’re paying attention. You might see things like: ● Clothes still dripping after the spin cycle ● A dryer that suddenly needs two cycles instead of one ● Thumping or grinding sounds that weren’t there before ● Water pooling under or around the washer ● A control panel acting strangely None of these means the machine is finished. More often, they point to a part wearing out or a system that needs attention. That’s when scheduling a washer-dryer repair makes sense instead of waiting for a full breakdown. The “I’ll Deal with It Later” Trap Almost everyone falls into this at some point. The washer still works mostly. The dryer still dries eventually. So the repair gets pushed to next week. Then next month. The trouble is that appliances don’t stabilize when something starts failing. Parts keep wearing down. Motors work harder. Heat builds up where it shouldn’t. A repair that could have been quick suddenly becomes more involved. What might have been a simple washer-dryer repair ends up costing more time and money later. Addressing the issue early is usually the smarter move. When Laundry Can’t Wait There’s another practical issue here. Laundry piles up quickly. Families, work clothes, school uniforms, towels, bedding… the list never really stops. That’s why many homeowners look for same-day appliance repair when something goes wrong. Waiting three or four days for service isn’t realistic for most households. Fast repair service can make a huge difference: ● You get back to normal routines faster ● No last-minute trips to laundromats ● Wet laundry doesn’t sit around growing mildew ● The appliance stops struggling under a failing part This is where experienced local technicians step in. Companies like A+ Appliance Repair focus on identifying the problem quickly and getting machines running again without dragging the process out. Problems Technicians See All the Time Washer and dryer issues often sound mysterious to homeowners, but to a technician, they’re pretty familiar territory. Some of the most common repair calls involve: ● Worn drive belts ● Faulty pumps or drainage problems ● Burned-out dryer heating elements ● Sensors or control board glitches ● Unbalanced drums are causing heavy vibration A trained technician can usually pinpoint the issue quickly and complete the needed washer-dryer repair safely. The goal isn’t just to make the machine run again, but to restore reliable performance. Why Professional Repair Matters There’s a lot of online advice about fixing appliances yourself. Some of it is helpful. Cleaning lint filters or checking hoses is perfectly reasonable. Internal repairs are another story. Modern washers and dryers include electrical systems, sensors, motors, and heating components that require proper tools and experience. Guesswork can make things worse or even create safety risks. Professionals bring something valuable to the table: a clear diagnosis. The team at A+ Appliance Repair deals with these machines every day, which means they can identify the real cause of the issue instead of replacing random parts. And when a home needs same-day appliance repair, that kind of experience matters. A Few Habits That Help Appliances Last Longer After the repair is done, small habits can keep things running better over time. Simple steps make a difference: ● Don’t overload the washer drum ● Clean the lint filter after every dryer cycle ● Check washer hoses occasionally for wear ● Keep the dryer vent clear so heat can escape These things won’t eliminate every problem, but they reduce unnecessary strain on the machine. Final Words: Laundry appliances rarely get much attention until they stop cooperating. When that happens, the inconvenience builds quickly. Acting early, scheduling the right washer dryer repair, and paying attention to warning signs can keep small problems from turning into major disruptions. At A+ Appliance Repair, we know how quickly laundry problems can pile up. Our technicians provide dependable same-day appliance repair and professional washer-dryer repair to help homeowners get their appliances running again without the long wait. If your laundry room is starting to feel backed up, A+ Appliance Repair is ready to help restore order.

Nothing disrupts your kitchen faster than a fridge that fails. When a Samsung refrigerator breaks down, it can ruin groceries and waste your time. Catching small issues early and calling A+ Appliance Repair for expert Samsung refrigerator repair service is the fastest way to prevent a full-blown emergency. How to Avoid Frequent Samsung Refrigerator Breakdowns Keep Your Fridge Clean Dust, crumbs, and spills might seem minor, but they make your fridge work harder. The coils, the vents, and even the drip trays all need attention. Clean them regularly. It’s not glamorous, but it keeps your fridge from overworking itself and breaking down prematurely. Check the Door Seals Doors that don’t close properly are a hidden killer. Warm air sneaks in, your compressor runs nonstop, and your fridge starts struggling. Check the seals, wipe them down, and make sure the doors click shut. A small fix here prevents big problems later. Watch How You Load It Stuffing the fridge full of heavy containers or blocking vents is a common mistake. Air needs to circulate freely. If it can’t, your fridge has to work harder, and that stress shows up as breakdowns over time. Pay Attention to Temperature Set the fridge at about 37 degrees Fahrenheit and the freezer at 0. Not 35, not 39. Temperature matters. Too cold, and parts freeze and strain. Too warm, and your food isn’t safe. Simple, but it’s easy to overlook. Notice the Signs Early Here’s the deal. If your fridge is making unusual noises, leaking water, or building up frost where it shouldn’t, it’s not going to fix itself. Calling a Samsung refrigerator repair service at the first sign of trouble is always better than waiting until it becomes an emergency refrigerator repair situation. Don’t Ignore Proper Use Hot food goes in after it cools, don’t leave doors open, and don’t cram items where they don’t fit. Treat the fridge like it’s a living system, because it is. These habits alone prevent a surprising number of breakdowns. Schedule Professional Checkups Even if you follow every rule, your fridge still needs a trained eye now and then. A technician can inspect parts that aren’t visible, catch wear before it turns into failure, and handle repairs correctly. This is the smart way to prevent repeated problems. Why It Pays to Call A+ Appliance Repair There is no need to wrestle with a broken fridge or even speculate about what is wrong with it. A+ Appliance Repair in Louisville knows Samsung refrigerators. We provide Samsung fridge repair service and emergency refrigerator repair service in a quick and reliable way. You have back your refrigerator, and you use it just as it used to be, without the guessing game and needless time losses. FAQ What are the early signs of fridge problems? If your fridge is making weird noises, leaking water, or frost is showing up where it shouldn’t, it is trying to tell you something. Catching these issues early can save you from a full-blown emergency and a lot of spoiled food. Why are door seals so important? Door seals might seem small, but they do a big job. If they are worn or dirty, warm air sneaks in, making your fridge work overtime. Wipe them down and make sure the doors close tightly. Your fridge will thank you. Can overloading my fridge cause damage? Absolutely. Stuffing it too full or blocking vents makes it harder for air to circulate. That extra strain can lead to breakdowns over time. Keep it organized and give the air some space to move. Why choose A+ Appliance Repair? We know Samsung refrigerators inside and out. Our team is fast and reliable and gets your fridge back to working like it should without guesswork or stress.
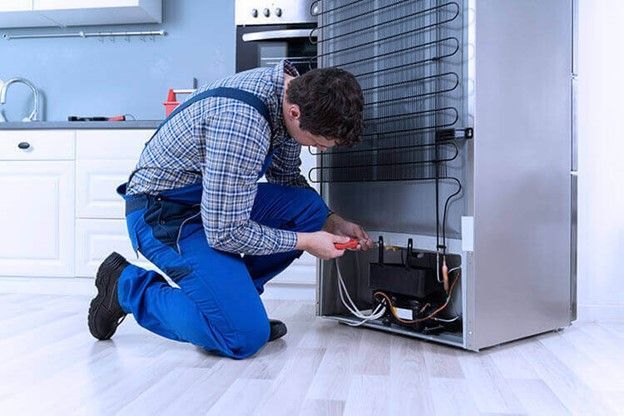
Older Kenmore refrigerators earn their place in a home. They have run quietly for years, handled daily use without complaint, and outlasted plenty of newer machines. But age changes the equation. Parts wear down. Systems drift out of balance. And problems stop announcing themselves clearly. That’s where experience matters. Not generic appliance knowledge. Not guesswork. An experienced Kenmore refrigerator technician understands how these older units were built and how they behave once time starts catching up. That kind of understanding is exactly what A Plus Appliance Repair Service brings to the table. Older Kenmore Refrigerators Don’t Behave Like New Models Older Kenmore refrigerators were designed around mechanical reliability, not digital shortcuts. They rely on physical components working in harmony. Thermostats, compressors, defrost systems, seals, and airflow all play a role. When one starts slipping, the effects ripple through the system. A newer refrigerator might throw an error code. An older one doesn’t. It just starts acting off. Temperature fluctuations. Frost buildup that doesn’t quite make sense. Water is pooling where it shouldn’t. These signs don’t point to obvious answers unless you’ve seen them many times before. A trained Kenmore refrigerator technician knows how to read those signs. That experience prevents misdiagnosis and unnecessary part replacements that only delay the real fix. The Most Common Problems Show Up Slowly Older Kenmore refrigerators rarely fail all at once. Problems creep in. Cooling weakens gradually. Ice makers stop producing consistently. Door seals lose tension and let cold air escape. Internal components work harder than they should. Many homeowners try quick fixes first. Adjusting settings. Clearing vents. Resetting the unit. Eventually, they search for a refrigerator repair service near me when nothing sticks. At that point, the problem has usually grown more complex. When things go wrong, A Plus Appliance Repair Service is patient and careful. Their workers don't rush through inspections. They look for the cause, not just the symptom. Why Experience Beats Speed Every Time Some repair services pride themselves on speed. Fast appointments. Fast diagnoses. Fast fixes. That approach doesn’t work well with older Kenmore refrigerators. These units require careful evaluation. A rushed inspection can miss underlying issues that will resurface weeks later. That’s how homeowners end up calling for the same repair again and again. A Plus Appliance Repair Service focuses on accuracy first. Their technicians understand how aging components affect performance and how small failures can lead to larger system stress. An experienced Kenmore refrigerator technician takes the time to get it right the first time. Professional Diagnosis Protects the Refrigerator You Already Own Replacing a refrigerator isn’t a small decision. Many older Kenmore units still have plenty of usable life left when they’re repaired correctly. The key is addressing problems before they cascade into major failures. Working with a reliable refrigerator repair service near me gives homeowners clarity. You know what’s wrong. You know why it’s happening. And you know what it takes to fix it properly. That kind of transparency helps you decide whether repair makes sense and prevents unnecessary replacements caused by poor diagnosis. Why Homeowners Trust a Plus Appliance Repair Service A Plus Appliance Repair Service has built its reputation by understanding appliances, not rushing through them. Their technicians are familiar with Kenmore refrigerators from different generations and know how each system changes as it gets older. They explain what they find in plain language. No pressure. No vague answers. Just clear information and professional repair work. That’s why homeowners continue calling them when they search for a refrigerator repair service near me and want dependable results. Experience shows in the details. How problems are identified. How repairs are handled. And how often the refrigerator keeps running smoothly long after the service visit. The Bottom Line Older Kenmore refrigerators don’t need guesswork. They need understanding. A qualified Kenmore refrigerator technician knows how to work with aging systems, spot hidden issues, and apply fixes that last. A Plus Appliance Repair Service provides that level of care. If your Kenmore refrigerator is showing signs of age, choosing a trusted refrigerator repair service near me can help restore reliable performance and extend the life of an appliance that’s already proven its worth. FAQs 1. Why do older Kenmore refrigerators need specialized repair experience? Older models use mechanical systems requiring accurate diagnosis to prevent misdiagnosis. 2. Can a general appliance repair service handle older Kenmore refrigerators? General services miss age-related issues that experienced technicians recognize quickly. 3. What problems are most common in aging Kenmore refrigerators? Cooling inconsistency, leaks, frost buildup, seals, and ice maker failures gradually. 4. Why is professional diagnosis important for older Kenmore refrigerators? Incorrect repairs can worsen issues and shorten the appliance’s remaining lifespan. 5. When should I call for Kenmore refrigerator repair service? At signs of inconsistent cooling, leaks, or noises before damage spreads.
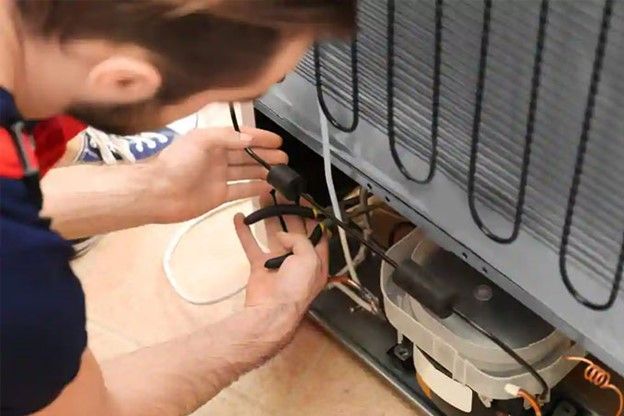
If you’ve ever walked into the kitchen and felt that strange warm air coming from the refrigerator door, you know the kind of worry it brings. It’s quick. It hits you right in the stomach. At A+ Appliance Repair Service, we’ve seen that moment more times than we can count, and honestly, it never gets easier for the person standing in front of that warm fridge. We get it. We really do. And that’s why we step in fast. When a Refrigerator Problem Starts Small… and Turns into a Big Disruption Sometimes the issue starts quietly. A little noise you barely notice. Or a section of the fridge that doesn’t feel as cold as before. People ignore these things because life gets busy, totally normal. But a Whirlpool fridge has its own way of telling you something’s not right. That’s usually when someone goes searching for whirlpool refrigerator repair near me , hoping to find someone who won’t make the situation worse. Or more stressful. Our team handles these repairs daily, and we’ve learned that clear explanations and steady hands calm people down more than anything else. We’ve been around since the sixties. Long enough to understand how much a refrigerator matters when everything else is already moving fast around you. That kind of experience shapes the way we work, and honestly, it keeps us grounded. What We Usually See with Whirlpool Refrigerators Cooling problems. Frost piling up where it shouldn’t. A door that doesn’t seal, so cold air leaks out little by little. Ice makers that stop producing ice right when you planned to use it. Loud humming that sounds harmless at first but grows into something more noticeable. We’ve dealt with all of it. Top-freezer models. French-door designs. Side-by-side setups. Even compact refrigerators that people keep in garages or smaller spaces. When a customer calls us for whirlpool refrigerator repair near me, they typically want someone who can get straight to the point. No long lectures. No pressure. Just a simple approach: “Tell me what’s wrong, show me the fix, and don’t make it complicated.” That’s how we operate. When It Turns into an Emergency Sometimes the fridge doesn’t warm up slowly. It just quits. No warning. You open the door and feel the temperature hit your face. Or you hear a sound that wasn’t there last night. What follows is usually mild panic, groceries on the line, and maybe medications too. This is exactly why we offer emergency refrigerator repair. Because appliances don’t wait for business hours. And your food definitely won’t wait either. When you call us during one of those urgent moments, we try to get someone out as soon as we realistically can. We don’t overpromise, but we move quickly. We know the stakes. A Bit About How We Handle Repairs There’s a rhythm to appliance repair work, but we don’t rush through it. We slow down enough to notice the smaller details. We check seals. Listen for the compressor. Look for small leaks. Make sure the airflow inside the fridge is doing what it should. We don’t overwhelm anyone with technical talk. That’s not our style. We speak in plain everyday language because that’s what helps people understand what’s actually going on. And it’s your fridge after all. You deserve to know exactly what we’re fixing. Maintenance Makes a Bigger Difference Than Most People Think A refrigerator can last years longer with small bits of maintenance here and there. You’d be surprised how many issues come from something as simple as dirty coils or a gasket that doesn’t close all the way. We help customers keep their refrigerators running longer by doing basic checks. Clearing frost that shouldn’t be there. Making sure temperatures stay stable. Keeping parts clean enough so they don’t break earlier than they should. These things feel small, but they save people a lot of money and headaches. Especially with Whirlpool refrigerators, which usually respond well to routine care. Why People Keep Choosing Us A+ Appliance Repair Service isn’t a giant company. We’re not trying to be. We’re a local team that shows up, does honest work, and leaves people feeling relieved. Our experience helps, sure, but what matters more is how we treat the job itself. We repair refrigerators like we want them to last. We explain things because people deserve clarity. And we give straightforward pricing so no one feels uncomfortable or unsure. Customers often tell us the same thing: they appreciate how simple we make the repair process feel. No noise. No confusion. Just real work, done right. Repair or Replace: The Question Everyone Asks There’s always that moment during a breakdown when someone wonders if it’s time for a new fridge. We don’t push people either way. If your refrigerator still has life left in it, we’ll say so. If it’s better to replace it, we’ll tell you that too. Most Whirlpool models under ten years old are worth fixing. They’re built well, and a few new parts can bring them back to life for quite a while. When You Need Us, You Know Where to Find Us If your fridge is giving you trouble, small or serious, we’re here to help. Whether you’re searching for whirlpool refrigerator repair near me or dealing with a sudden breakdown that needs emergency refrigerator repair , reach out and we’ll take care of it. A+ Appliance Repair Service is built on clear communication, steady work, and a real understanding of how much a refrigerator matters when it goes down. We’re always ready to help you get things back on track.
For immediate, compassionate help with refrigerators, washers, dryers, dishwashers and more, call for Emergency Appliance Repair Louisville at A+ Appliance Repair Service.
How to Repair Frigidaire Washer Laundry can be very unpredictable; even a slightly malfunctioning washer can spoil the whole day's plans.

Who Fixes Appliances near me From our fridge stops cooling to a dishwasher suddenly flooding in the kitchen, appliances can significantly affect our daily lives as we are greatly dependent on them.
How to Fix My Dryer Don’t let a simple fix turn into a big problem. Get your dryer working again with a quick call to our professional technicians.
Samsung Dryer Not Heating Up? Call the Experts at A+ Appliance Repair Services Don’t let a simple fix turn into a big problem. Get your dryer working again with a quick call to our professional technicians.